Gather together the documentation to be submitted with the requisition.
Make sure there is a vendor number set up in the system for the person or company the check is to be made out to. You can check this by going into screen "VEIN" and typing in the vendor name. If it does not show up on the list, there is no vendor in the system, and a new vendor number will have to be set up in Datatel by purchasing. At this point, call or email purchasing with your request. Please include vendor name, remittance address, phone number and fax number if available. The vendor cannot be the initiator nor the approver of the requisition.
Enter the screen mnemonic "REQM" in Datatel (this will take you to the requisition entry screen)
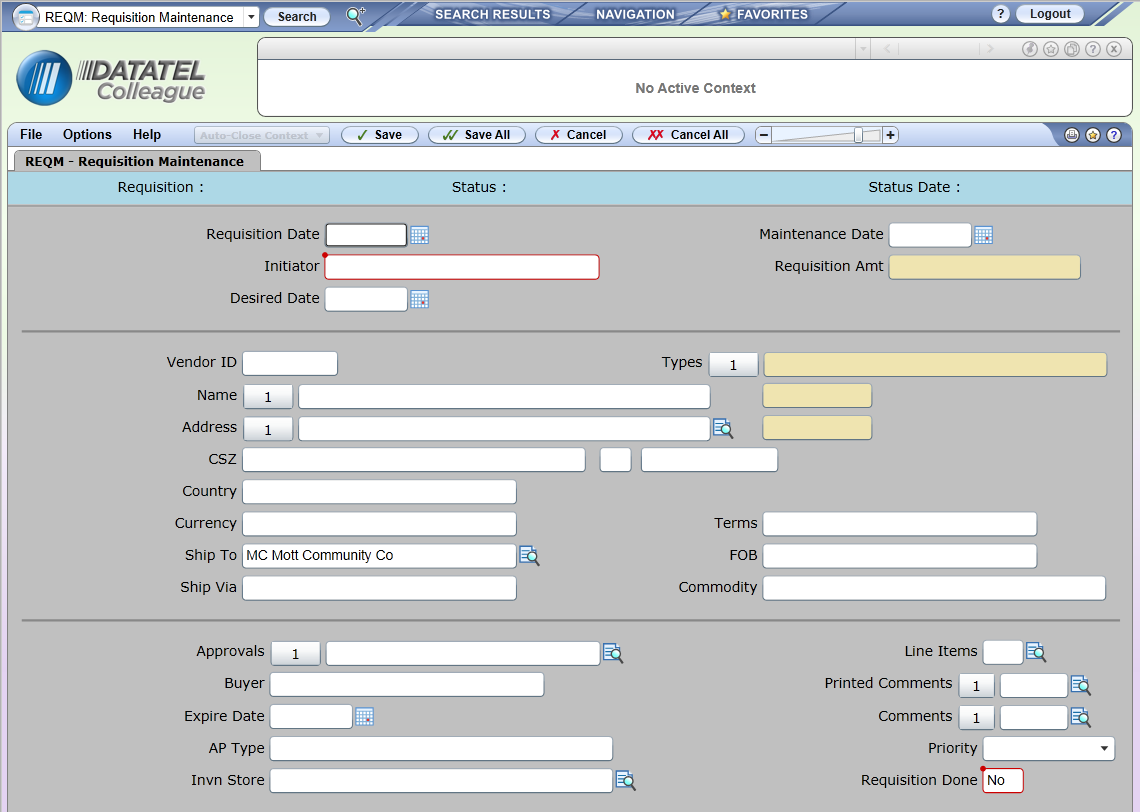
Enter the date of the requisition. Computer will default to current date if not changed.
Enter the initiator. This is the person entering the requisition.
Enter the "desired date". This is the date you would like the check to be ready, if possible, and if the documentation deadline is met.
Enter the VENDOR ID. Requisitions will not be processed without a vendor number and populated address. If the vendor number is not known, type the name of the vendor and the system will search for the vendor number. If more than one vendor with this name if found, you will be given a listing of all the vendors with this name and you will need to select the one you want. Please note some vendors have several addresses.
NOTE: The purchasing department maintains vendor records if an update/correction is needed.
Type your department in the Ship To field.
Enter the terms. Net 30, net instant, or prepaid. Mott College’s default is net 30. If the DVP is a cash advance read the separate section on prepaids for further instructions.
Detail to enter the person you want to approve the requisition. Please note that some cost centers need additional approvals and may require more than one manager's approval. Please check with purchasing or accounting if you are unsure who needs to approve it.
Enter DVP as the "AP TYPE". If you want to buy items or service, call purchasing before placing the order or calling the vendor.
Enter the line items and type a description on the next screen. (Note: only the 1st 25 characters print.) Type pertinent info first such as invoice number, staff name, or membership ID. Payments encompassing the end of June and first of July require a separate line item for June activity. June must post in its correct fiscal year.
Write any special instructions (such as “separate check needed”) on the documentation and also type in the requisition for DVP in the "Comments" & "Printed Comments" fields. This will be for Mott Accounts Payable's use only as Colleague/Datatel combines all vouchers into one payment for a vendor unless you notify otherwise.
If you need an enclosure/attachment to go with a payment, there are two options:
The "PO#" and voucher # can be found in RINQ. Initiators should check the status of requisitions frequently. Keep in mind, the "PO#" generated with a DVP is not an official PO. It is merely a number used by Datatel to move forward. Only POs issued by purchasing are official standard or blanket purchase orders.
If a "PO#" has not been assigned -- ensure the requisition is FULLY approved and "Requisition Done" is Yes. If so, then contact the accounting department front desk to make sure the documentation was received. The front desk handles the mail.
